 |
How-To
Use |
| INSTRUCTIONS and INSTALLATION TIPS – |
 |
|
FauxToys
Wraps for Box-Bodied Cars, including |

| GENERAL
INSTRUCTIONS for both PERMANENT and TEMPORARY MOUNTING |
|
Protecting the Wraps (Optional Step) - FauxToys wraps are reasonably tough and water-resistant. However pressing on the wrap with wet hands may leave permanent fingerprints in the gloss surface. Two coats of common paste wax will give increased protection to the surface. See Details.
| |||||
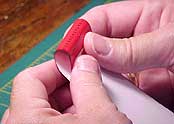 |
Pre-curve the Edges (Important) - Note that the ends of Marx® 6" cars have an apron which extends below the line of the sides. The wraps also have an apron. Gently roll the wrap between the fingers until there is a curve from about 1/2" endward of the notch where the apron ends to 1/4" sideward of the notch. Continue to roll more tightly until the wrap takes and holds a curve of sharper than 90°. For
PERMANENT
MOUNTING on cars
of no collector value, continue reading. |
| PERMANENT
MOUNTING On Cars of No Collector Value |
| Doors and Guides - If the car has sliding doors, remove doors and guides and discard. Bend the assembly tabs just enough to remove the body from the frame. Overbending can cause tabs to break. Working with Tabs . Then remove the doors and guides from inside the body. Reassemble body and frame. Clean or Repaint car roof and frame, if necessary. Cleaning and Painting Tips . |
 |
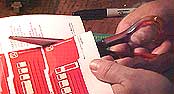
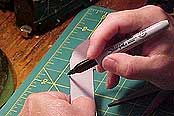
Cut, Darken and Precurve the Wrap - See General Instructions above. Prepare
the Wrap |
| TEMPORARY
MOUNTING On Valued Cars, or Cars to be Used with Different Wraps |
| Most FauxToys wraps can be applied temporarily to valued cars, with no gluing or other damage to the car. This is done by using double-sided tape to stick the wrap ends to each other, creating a sleeve that can slide off the car from the top. You may need to press the roof curves inward slightly, if the roof interferes with removal. Temporary mounting also lets you use the same car body for several different wraps. Doors and Guides (Valued Cars) - 3-D doors and guides interfere with temporary mounting, so for valued cars, use only on the simpler boxcar bodies with the doors printed right on the car. Doors and Guides (Junk Cars or Common Cars) - If the car has sliding doors, remove doors and guides and discard. Bend the assembly tabs just enough to remove the body from the frame. Overbending can cause tabs to break. Working with Tabs . Then remove the doors and guides from inside the body. Reassemble body and frame. (Junk Cars) Clean or Repaint car roof and frame, if necessary. Cleaning and Painting Tips. Reassemble car, if necessary. |
 | (All
Cars) |
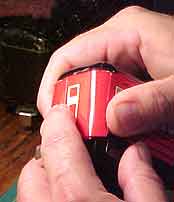 |
Apply the Wrap - Be sure your hands are dry. Hold the car tightly between the two wraps, with the lower edges of the wraps running along the lower edges of the car body, just above the frame. Be sure the apron edges are correctly lined up. With
the other hand, smooth the wrap around the end of the car,
with the copyright end on the bottom and the tape-charged end above it. Press
down on the overlapping end to stick it solidly to the underlying (copyright)
end. |
|
The wrap will now form a sleeve, which can be slid on and off the car (If the roof pieces overhang the ends and prevent removal of the wrap, gently push them in a bit). Or the wrap can be removed by pulling up one of the taped ends. Use a fresh piece of tape to reapply. |
| APPLYING
HATCHES and OTHER DETAILS To Refrigerator Cars, Pickle Cars, and Special Cars |
|
Some cars come with hatches or other add-on paper details. Usually
these have too small a surface area for double-sided tape to hold, especially
on curved surfaces. They must be applied with adhesive, and therefore are for
permanent application only.
|
| Adhesives - A single drop of super-glue in the center of the hatch seems to work well. Larger pieces may need more. Avoid water-based adhesives. Tweezers help to avoid smearing the glue. Cut Out and Darken Edges as for the main wrap. Pre-curve the hatch to go on the area planned. Test fit. When the curve is right, place a drop of super-glue on the back of the hatch and put the hatch in place. Tweezers help to avoid smearing the glue. REFRIGERATOR CARS have one ice hatch at each corner of the car's roof. The hinges face forward and back toward the center of the car. Some refrigerator cars did not have ice hatches. PICKLE-VAT CARS have a hatch over each vat. The hinges face the centerline of the roof. WEDGE TENDERS use a round-end strip for the raised panel on the tender side. |